

From Daily Irritation to a Perfect Shave – One Customer’s Maintenance Turnaround

From Daily Irritation to a Perfect Shave, One Customer’s Maintenance Turnaround
Every morning for almost eighteen months, James, a 34-year-old project manager from Leeds, dragged the same electric shaver across his face and walked away with red, angry skin. He blamed his aftershave. Then his water. Then his skin type. He cycled through three different moisturisers and even bought a dedicated pre-shave lotion. Nothing worked. His shaver still buzzed reassuringly. It still felt substantial in his hand. So it never occurred to him that the shaver itself, or more precisely, what he was neglecting to do to it, was the source of every uncomfortable shave.
This is James’s maintenance turnaround. It is a practical case study in what happens when a capable device is let down by a handful of easily corrected habits, and what changes when those habits are fixed. If your morning shave has quietly worsened over recent months, this story will feel familiar, and the solutions will apply directly to you.
Key Takeaways
- Dull blades cause skin damage, not just a worse shave: According to Electrospares.Net Ltd’s guide on dull blade signs, worn foils and dull blades scrape instead of cutting, triggering an inflammatory response that shows up as redness and ingrown hairs. If post-shave redness has crept into your routine, check your blade lifespan before changing anything else.
- Most people replace blades two years too late: The standard replacement window is 12 to 18 months, but as the Electrospares.Net Ltd foil lifespan guide makes clear, daily shavers with coarser hair should treat the 12-month point as their target, not the outer limit.
- Cleaning, lubricating, and replacing are three separate jobs: As WikiShaver’s annual maintenance plan explains, rinsing after every use, oiling the cutter weekly, and replacing the foil and blade when worn are all distinct habits, none substitutes for the others.
- Genuine parts outperform generic alternatives by a wide margin: Electrospares.Net Ltd’s genuine vs counterfeit parts analysis found that a genuine OEM cutting cassette lasted a full two years in real-world use, while an incorrectly matched generic part declined noticeably in only four months. Calculate cost-per-month, not sticker price.
- Replacing the head is almost always cheaper than replacing the shaver: A cost comparison from Shave One puts replacement heads at roughly one-third the cost of a new device across major brands. Act on the warning signs early and you will rarely need a new shaver.
Quick-Start Prioritisation Framework
| Action | Best For | Effort Level | Time to Results |
|---|---|---|---|
| Daily rinse or brush-out | Every user, absolute minimum | Low | Immediate |
| Weekly deep clean and lubrication | Daily shavers, sensitive skin | Medium | 1 to 2 shaves |
| Foil and blade replacement | Shavers past 12 months old | Low to medium | Same shave |
| Switch to genuine OEM parts | Anyone currently using cheap generics | Low | Same shave |
| Battery and storage habits | All cordless shaver owners | Low | 6 to 12 months |
| Correct shaving technique | Anyone pressing hard or using wrong stroke pattern | Low | Same shave |
Start here if you are:
- A daily shaver experiencing irritation: Begin with a thorough head clean. If irritation persists after one week of proper cleaning, replace the foil and cutter block; it has almost certainly passed its useful life.
- Someone who has never replaced parts: Order your model’s genuine OEM foil and cutter now. The performance shift will be immediate and significant.
- A new shaver owner: Lock in the cleaning and lubrication habits before anything degrades. Prevention costs a fraction of what correction does.
How James’s Problems Started, and Why They Are More Common Than You Think
The Shaver That Felt Fine
James had owned his Braun Series 7 for just over two years when he reached out for advice. The shaver powered on without issue. The motor sounded normal. He cleaned it, or thought he did, by giving the head a quick tap over the sink most mornings. He had never replaced the foil or the cutter block. He had never lubricated it. He stored it on the bathroom shelf, inches from his shower.
Most people replace their electric shaver blades about two years too late. The shaver still turns on and still buzzes against your face, so it feels fine. But dull blades do not announce themselves. They quietly start pulling instead of cutting, leaving your skin red and your shave patchy. James was a textbook example.
The Symptoms He Ignored
For months, James had written off every warning sign. Tugging and pulling is the first signal; it is the most immediate and unmistakable sign of dull blades. Redness, bumps, and ingrown hairs appear when blades scrape instead of cutting, requiring a low-effort fix: blade replacement combined with post-shave balm. A louder motor during the shave is another indicator, often caused by increased mechanical resistance.
James had experienced all three. He had simply attributed them to other causes.
Pro Tip: If your shaver has started pulling on hair, clean the head thoroughly before concluding the blades are worn. As Electrospares.Net Ltd’s blade replacement guide explains, hair clippings, skin cells, and product residue can clog foil holes and block hair passage, forcing the shaver to yank instead of cut. If tugging persists after a thorough clean, the blades are the culprit.
Step One, The Cleaning Habits James Was Missing
What a Proper Daily Clean Actually Looks Like
The most important single habit in electric shaver maintenance is cleaning the head immediately after use. The single most important habit is cleaning the shaver immediately after use. Loose hairs and skin oils dry into a sticky film that is much harder to remove later. James’s quick tap over the sink left the majority of that debris in place.
Metzcare’s electric shaver cleaning guide recommends a daily routine that takes under one minute: turn the shaver off, remove the shaving head or open the cutter frame, tap loose hair into the sink, and then use a small brush to clear remaining debris. Critically, avoid brushing directly against foil screens. Side brushing bends metal and causes uneven cutting.
After brushing, close the head and store the shaver in a dry, open space. Never seal it in a damp case immediately after use.
The Weekly Deep Clean James Had Never Done
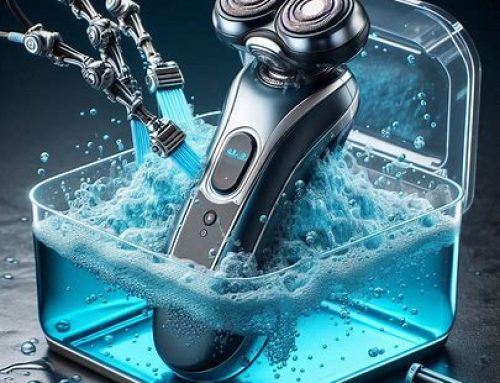
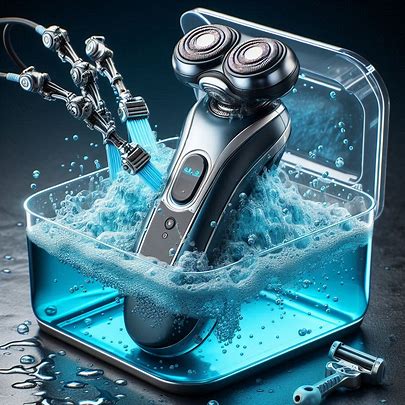
For waterproof shavers, a weekly wet clean makes a substantial difference. Once a week, remove the shaver head according to the manufacturer’s instructions and clean it more thoroughly. For a foil shaver, remove the foil and cutter and brush out any hair trapped beneath. For a rotary shaver, lift each cutter out of its slot and brush the hair from the base.
Recommended cleaning solutions include alcohol-based shaver cleaning sprays, diluted white vinegar in a 1:1 ratio with water, unscented dish soap and water, and hydrogen peroxide at 3% solution. Avoid bleach, multi-surface cleaners, acetone, and harsh chemical solvents, as these can damage blades and degrade plastic components over time.
James had been using a generic bathroom surface spray on his shaver head. Within days of switching to a purpose-made cleaning spray and adopting a proper weekly rinse, the motor noise had reduced noticeably.
Step Two, Lubrication, the Habit Nobody Thinks About
Why Oil Matters More Than Most People Realise
Lubrication reduces friction between the foil and the cutter, which keeps the motor running smoothly and prevents the blades from heating up. James had never applied a single drop.
Many users clean regularly but never lubricate. Lubrication is not optional; it is what keeps metal-on-metal friction from wearing down the blade coating prematurely.
The correct approach is simple. After cleaning, apply a drop of light machine oil or the manufacturer’s recommended lubricant to the cutter blades, or to the centre post of each rotary head. Run the shaver for a few seconds to spread the oil evenly.
Apply one to two drops of oil every two weeks for regular use. Avoid over-lubricating, excess oil attracts more dirt and gunk buildup, and can also leak into the motor housing or damage the rechargeable batteries of cordless models.
Pro Tip: Do not use cooking oil, WD-40, or petroleum-based products, these can damage seals and blade coatings. Use only light machine oil, sewing machine oil, or a specialist clipper oil. One drop per cutter head, fortnightly.
Step Three, Replacing the Foil and Cutter Block
The Part James Had Never Touched
James had owned his shaver for over two years without replacing the foil or cutter block. This is the single costliest oversight in electric shaver maintenance, because no amount of cleaning or lubrication restores a worn foil.
For most people shaving daily with average-density hair, the consensus across major manufacturers and independent grooming specialists is clear. Most brands recommend that foils and blades should be changed every 12 to 18 months to continue the performance of an electric shaver.
Philips officially recommends replacing shaver heads every 12 months to get back to optimal, like-new performance for its rotary entry-level series, while foil specialist Braun recommends changing foil and cutter block every 18 months with good cleaning habits and an average shaving frequency. James was at 26 months. The foil was effectively a different tool from the one he had bought.
What the Replacement Actually Fixed
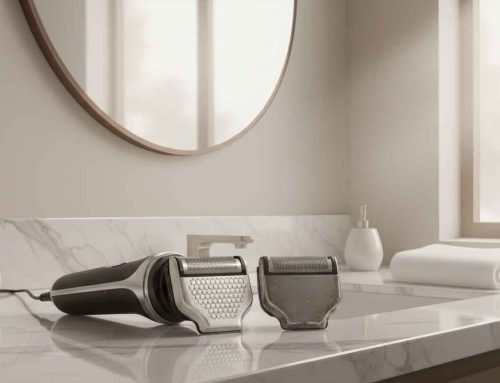
Fitting a genuine OEM replacement foil and cutter block to James’s Braun immediately changed the character of the shave. The pulling sensation disappeared on the first use. The post-shave redness he had attributed to sensitive skin was significantly reduced by the following morning.
The encouraging news is that recognising the warning signs early means you rarely need a brand-new shaver. In most cases, replacing the shaver head is the smarter, more cost-effective option. Electric head shavers are designed to last for years, the motor, battery, and internal components typically outlive the blades.

Step Four, Why Genuine Parts Made the Difference
The Counterfeit Detour James Almost Took
Before contacting Electrospares.Net Ltd, James had searched for replacement parts on a general marketplace and found a cassette listed at a fraction of the genuine price. He was close to buying it when he read about the risks.
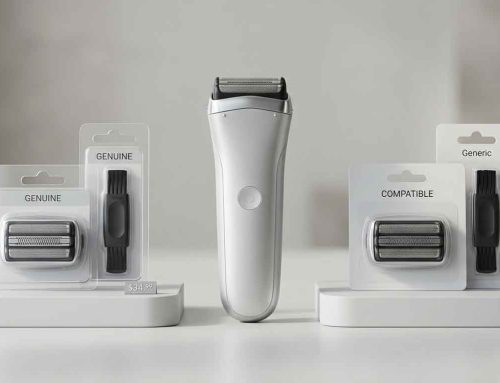
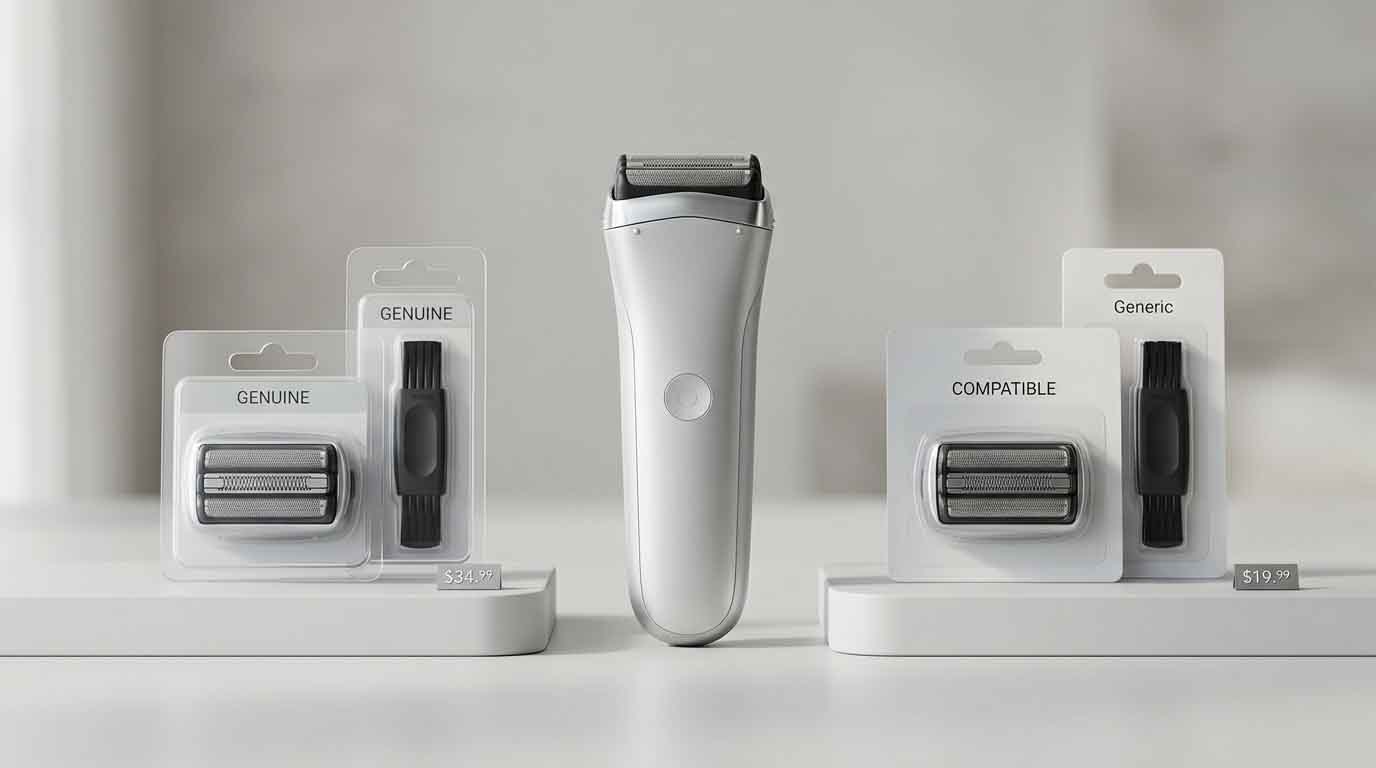
Genuine manufacturer replacement parts are engineered to tighter tolerances than generic third-party alternatives. One real-world case showed an original cutting cassette lasting a full two years, while an incorrectly matched generic part lasted only four months before performance dropped noticeably.
The cost difference is even sharper when you account for the risk to the shaver itself. A bad compatible foil can damage the motor. In practice, if a counterfeit foil destroys the motor through excessive friction, the manufacturer is unlikely to cover the repair. The head costs £15 to £30; the motor costs you the whole device.
What “Compatible” Actually Means
The word “compatible” on a product listing carries a specific meaning that many buyers overlook. A specialist aftermarket guide clarifies that “compatible” identifies the intended shaver fit only and does not mean the part was made by Braun or will perform identically to an original replacement. “Compatible” does not promise identical shaving results, closeness, comfort, noise, cleaning behaviour, and service life can all vary between products and suppliers.
Pro Tip: OEM parts are produced by or under licence from the original manufacturer to the same engineering specifications as the parts shipped with the device. Compatible parts are produced by third parties and designed to fit the same models, but without access to the manufacturer’s proprietary engineering data. OEM parts bear practically the same quality as the original, whereas generic brands offer less protection against damages and are prone to breakdowns.
For James’s active daily-use Braun, the genuine foil and cutter block from Electrospares.Net Ltd, a verified UK specialist stocking genuine OEM parts across major brands including Braun, Philips, and Panasonic, was the obvious choice. From year two onward, annual running costs drop to the price of one set of replacement heads, typically £40 to £50 for major brands. That is the true comparison: not the price of one genuine part versus one cheap generic, but the cost of genuine parts over two years versus a failed motor and a new shaver.
Step Five, Technique and Battery Habits That Sealed the Improvement
The Pressure Problem
Even with a fresh foil and a properly cleaned and lubricated shaver, technique can undo most of the benefit. James had developed the habit of pressing the shaver firmly against his jaw, particularly on his neck. Keep the shaving head in contact with your skin and use gentle, consistent pressure. Pressing harder does not give a closer shave and can increase irritation.
For rotary shavers, use small slow, circular motions, moving the shaver against the direction of hair growth for the closest cut. For foil shavers, use short, straight up-and-down strokes, again moving against the grain. Mixing the motions up, circles on a foil, up-and-down on a rotary, reduces cutting efficiency and forces you to go over the same area more times than you should.
James uses a foil shaver. He had been using circular motions. Switching to short, straight strokes against the grain resolved the persistent patches on his neck within a week.
Battery Care and Storage
James stored his shaver on an open bathroom shelf, directly above the shower. Humidity is one of the most consistent silent threats to internal components. Avoid storing a shaver in an area that suffers from large temperature fluctuations, such as in direct sunlight or in a damp bathroom, as such conditions can cause premature blade wear and failure of internal components of the motor. Instead, store your electric shaver at room temperature away from moisture, such as inside a drawer or cabinet.
On the battery itself, as a general rule, avoid running the shaver completely flat before recharging. Lithium-ion cells last longest when kept roughly between 20 and 80 percent charge.
The older advice of fully draining before recharging applies to older battery technology, not modern lithium-ion. Modern lithium-ion batteries thrive on partial cycles, and topping up multiple times per week does not harm capacity; it actually helps maintain voltage stability.
Moving the shaver to a bedroom drawer and changing his charging habits added nothing in cost or time to James’s morning routine. It does, however, protect the battery from the kind of gradual degradation that leads people to buy a new shaver two or three years earlier than necessary.

The Financial Case for Maintenance
Replacement vs. Repair: The Numbers
The economics of maintenance versus replacement are worth understanding before you assume a declining shave means you need a new shaver. Replacement heads for a mid-range foil shaver typically cost between $30 and $50, while a new shaver in the same category runs $100 to $150. That puts replacement heads at roughly one-third the price of a new device, a ratio that holds fairly consistently across major brands.
Stretched over multiple years, the maths become even clearer. Spread a £150 device purchase over five years, add one head replacement every 18 months, and the annualised cost of electric shaving drops to well under £60 per year by years three through five. Compare that to the £120 to £200 annual total for cartridge shaving, and the financial case becomes clear.
James’s total cost of the turnaround was one genuine OEM foil and cutter block, one bottle of shaver oil, and a purpose-made cleaning spray. His shaver, which he had been considering replacing entirely, performed like new within the first week.
Pro Tip: Before you buy a replacement shaver, always replace the head first and give it three or four shaves to settle. Replace the blade cassette when tugging or closeness decline is the primary symptom and the shaver is under five years old with normal motor and battery function. The overwhelming majority of electric shaver performance problems are not signs of a broken or failing device; they are maintenance signals.
Common Mistakes That Undermine a Maintenance Routine
The Five Errors Most People Make
- Cleaning only the outside of the shaver head and never disassembling it for a proper brush-out.
- Using water on a non-waterproof shaver, or conversely, avoiding water on a shaver rated for wet cleaning.
- Lubricating too much rather than too little, excess oil attracts debris and can reach the motor housing.
- Buying generic replacement parts based on price alone without verifying model compatibility or manufacturing origin.
- Storing the shaver in a humid environment, leaving it on charge indefinitely after it reaches 100%, or running the battery to zero repeatedly.
Dry shaving, shaving too quickly or shaving with a dull blade can all cause razor burn. The skin irritation usually shows up a few minutes after shaving, and it usually lasts from a few hours to a few days. The good news is that each of the errors above has a straightforward fix that costs nothing beyond a small amount of attention. Tugging means blades need replacing or the shaver needs cleaning. Reduced closeness means blades are worn or debris has lifted the foil from skin level.

Frequently Asked Questions
How do I know if my electric shaver blades need replacing?
The most immediate and unmistakable sign of dull blades is a pulling sensation during the shave. Instead of cutting each hair cleanly at the skin line, a dull cutter catches the hair and yanks it slightly before severing it, or fails to cut it on the first pass entirely. If your shaver feels like it is plucking hairs rather than shaving them, the blades have lost their edge. Persistent post-shave redness or patches of missed stubble are further confirmation. Clean the head first, if the problem persists, order a replacement foil and cutter block.
How often should I replace my foil and cutter block?
Most people should replace the foil or cutting head of an electric shaver every 12 to 18 months, and replace the entire electric shaver every 3 to 7 years, depending on shave frequency, hair coarseness, and maintenance habits. Daily shavers with coarse hair often need a new head closer to the 9 to 12-month mark, while occasional users with fine hair can sometimes stretch the same head past 24 months without a noticeable drop in performance.
Is there a real difference between genuine OEM and compatible shaver parts?
Yes, a significant one in practice. Genuine OEM parts last 12 or more months, while knockoffs typically dull within 8 weeks. That gap translates directly into cost and performance. Spend once on the right part, or spend repeatedly on the wrong one. For a premium shaver in daily use, genuine OEM parts also protect the motor from the excess friction that a poorly matched generic foil introduces.
Can I damage my shaver by cleaning it incorrectly?
Yes. Always follow the instructions of the manufacturer when cleaning your razor, as it can get damaged if done incorrectly. Specifically, avoid brushing directly against the foil surface rather than parallel to it, using harsh chemical cleaners, applying water to a non-waterproof model, or reassembling the shaver head before all components are fully dry. Moisture trapped inside can affect motor performance over time.
How should I store my electric shaver to protect it long term?
Always store your electric shaver in a dry, cool environment to preserve battery life. A bathroom cabinet away from the shower spray, or a bedroom drawer, are both significantly better than leaving the unit on the shower shelf or the side of the bath. If you are storing it for an extended period, battery care guidance recommends keeping the charge between 40% and 60% rather than storing fully charged or fully depleted. Avoid leaving the shaver on charge continuously after it reaches 100%.
Does pressing harder with an electric shaver give a closer shave?
No. Always move the shaver over the skin without pressing too hard. Some shavers tend to get warm after a while and excess pressure will only make this worse. Pressing harder will not give a closer shave, nor will it capture flat-lying hairs more efficiently. Correct technique, light pressure with the right stroke pattern for your shaver type, delivers a closer result with less irritation and less wear on the foil.
Where James Is Now
Three months after his maintenance turnaround, James’s morning shave takes the same amount of time it always did. The redness is gone. The ingrown hairs on his neck, which he had accepted as a feature of his skin type, have not recurred. His Braun Series 7, which he was planning to replace, is performing as it did in its first year.
The changes he made were not dramatic. A weekly deep clean, a fortnightly drop of oil, a new genuine foil and cutter from Electrospares.Net Ltd, a shift to a bedroom drawer for storage, and lighter pressure during the shave itself. The cumulative effect of those adjustments was a complete turnaround in shaving comfort.
It is important to keep your electric shaver in shape and working at optimum performance. Many men discard an electric shaver which is only a year or two old believing it to be worn out when in reality it just needs replacement parts. James nearly did exactly that. The case for a proper maintenance routine is simply this: the shaver you have is almost certainly capable of giving you a genuinely good shave. Give it the attention it requires.
Sources
- Four Clear Signs Your Electric Shaver Blade Has Gone Dull, Electrospares.Net Ltd. Signs of blade wear and skin irritation causes. https://www.shaver-spares.co.uk/Article/4-Signs-our-Electric-Shaver-Blade-Is-Dull
- How Long Do Shaver Foils Last? Replacement Guide, Electrospares.Net Ltd. OEM replacement frequency guidance for daily shavers. https://www.shaver-spares.co.uk/Article/How-Long-Do-Shaver-Foils-Last-Replacement-Guide
- Electric Shaver Maintenance for Longevity, WikiShaver. Full yearly maintenance plan including cleaning, oiling, and battery care. https://wikishaver.org/learn/how-to-maintain-electric-shaver-for-longevity/
- Fake Shaver Parts Are Costing You More Than You Think, Electrospares.Net Ltd. Genuine vs counterfeit parts analysis and safety risks. https://www.shaver-spares.co.uk/Article/Genuine-Counterfeit-have-Parts-Hidden-Costs
- Compatible Shaver Heads vs Genuine OEM Parts, Electrospares.Net Ltd. Cost analysis of OEM vs compatible parts including motor risk. https://www.shaver-spares.co.uk/Article/Compatible-vs-Genuine-Shaver-Heads-True-Cost
- When to Replace Shaver Blades: 5 Clear Signs, Electrospares.Net Ltd. Warning signs and replacement decision framework. https://www.shaver-spares.co.uk/Article/When-to-Replace-Shaver-Blade-5-Clear-Signs
- Seven Signs Your Shaver Foil Needs Replacing Right Now, Electrospares.Net. Urgency framework for common foil wear indicators. https://www.electrospares.net/seven-signs-your-shaver-foil-needs-replacing-right-now/
- How to Clean an Electric Shaver the Right Way, Metzcare. Daily cleaning routine and technique guidance. https://metzcare.com/blogs/tips/how-to-clean-an-electric-shaver-the-right-way
- Electric Shaver Maintenance: Your DIY Guide, Appliance Journal. Cleaning frequency, lubrication, and battery discharge guidance. https://appliancejournal.com/electric-shaver-maintenance-your-diy-guide/
- How Often to Replace an Electric Shaver: The Complete Timeline, Aisen Appliance. Replacement intervals by component type and user profile. https://www.aisenappliance.com/news/industry-news/how-often-to-replace-an-electric-shaver-the-complete-timeline.html
- Do Electric Shavers Get Dull? Blade Wear Signs and Replacement Guide, Shave One. Blade wear mechanics, replacement timing, and cost comparison. https://shaverone.com/blogs/news/do-electric-shavers-get-dull-blade-wear-signs-replacement-guide
- Electric Shaver vs Razor Blade Cost Comparison, Electrospares.Net Ltd. Long-term cost analysis of electric shaving including replacement heads. https://www.shaver-spares.co.uk/Article/Electric-Shaver-vs-Razor-Blade-Cost-Comparison
- Seven Habits That Extend the Life of Any Electric Shaver, Electrospares.Net Ltd. Storage, battery, and maintenance habits for longevity. https://www.shaver-spares.co.uk/Article/How-to-Extend-Electric-Shaver-Life-7-Habit
- How to Make Electric Shaver Last Longer: 8 Habits, Electrospares.Net Ltd. Battery storage and humidity guidance for long-term care. https://www.shaver-spares.co.uk/Article/How-to-Make-Electric-Shaver-Last-Longer
- Genuine vs Compatible Shaver Parts: The Evidence, Electrospares.Net Ltd. Legal meaning of “compatible” and OEM specification differences. https://www.shaver-spares.co.uk/Article/Genuine-vs-Compatible-Shaver-Parts
- Why Resellers Choose Genuine OEM Shaver Parts, Electrospares. OEM vs compatible part definitions and consistency comparison. https://www.electrospares.net/bulk-shaver-parts-for-resellers-oem-vs-generic/
- Electric Shaver Not Cutting Properly? Troubleshooting Guide, ShaverLabPro. Mechanical causes of pulling, irritation, and when to replace vs repair. https://shaverlabpro.com/electric-shaver-not-cutting-properly/
- Razor Burn: Causes and Treatment, Cleveland Clinic. Clinical definition and causes of razor burn including dull blade effects. https://my.clevelandclinic.org/health/diseases/23583-razor-burn
- How to Use Electric Shaver Properly, TheWearify. Technique guidance for foil and rotary shavers including pressure and angle. For rotary shavers, use small
- Dry Electric Shaving Tips: Get Your Best Shave Ever, ShaverCheck. Pressure, grain direction, and stroke pattern guidance. https://shavercheck.com/dry-electric-shaving-tips/
- Why and When You Should Replace Your Blades and Foils, Shavers.co.uk. Manufacturer replacement recommendations and common misconceptions. https://www.shavers.co.uk/blog/why-and-when-you-should-replace-your-blades-and-foils/